Saturday 26 February 2011

London Fashion Week

So its London Fashion Week and I decided to see what roles graphic designers have in the show and in fashion itself.

The trade show has a strong simple brand which hasn't really changed since it started. I think the main focus is obviously on the clothes and the designers but the brand can be seen throughout the capital in the run up to the event.
I also looked into poster designs and how they are used to advertise the show. Below is a poster created by Paul Smith, which uses its iconic coloured branding to create an image that resembles a tangled, coat-hanger underground map.
The Paul Smith brand is covered in the book 'Graphic Design for Fashion', which can be seen here on the on the Creative Review site.

Frankenstein

Last night I fell asleep watching 'The Review Show' on BBC Two. The panel were reviewing Danny Boyle's Frankenstein theatre production.
Danny Boyle is an English filmmaker and producer known for his work on films such as Slumdog Millionaire, 28 Days Later, 127 Hours and Trainspotting. They were saying how the opening 5 minutes contains no dialog and has a cinematic feel to it. The host said that this was a clear 'design' decision made by Boyle.

It got me thinking about design and how it is in every aspect of our lives, what we eat, what we wear and what we watch. Growing up I always wanted to make movies and last night I wondered if there were any Graphic Designers who have ventured into the realms of film production.
Another design decision made by Boyle, that I thought was really interesting, was to have the two central characters alternate roles. It was a different take on the traditional Frankenstein tale. It seems interesting, the idea that Frankenstein and his monster are alter-egos .

The production has sold out but apparently a filming of the show is going to be released as a special screening in selected cinemas. 

The Economist

I meant to put this image up a while ago, its taken from the front cover of The Economist's August 2010 issue. It shows David Cameron sporting a Union Jack coloured Mohawk to symbolise his 'radical' start as PM.
The Economist is a very influential global magazine and they have gone for a very strong image which portrays a clear message.

This week we are supposed to be thinking about a specialism and an area we would want to work in, in the future. Since the case study on Peter Saville, I've wanted to use graphic design to 'communicate a message' to an audience. He said how fashion tells us what to wear, graphic design tells us what to buy and art tells us how to think and feel.

But I think the line between art and design is very thin. Who says an advert can't be a piece of art?

Wednesday 23 February 2011

Photography - Induction

Today I had my photography induction in the dark room at the Clarendon Building. The lesson was with Ikuko Tsuchiya, a photographer who had an exhibition at the university last month. Her work focuses on using photography as a therapeutic agent in healthcare.

Today we worked without a camera and were taught the basic principles of exposing photographic paper to light. The process involved placing an object on top of the photographic paper, exposing it to various strengths of light and then fixing that image in a chemical bath.
Above are some examples of the work I created today, the first was created with a long exposure to light which resulted in the dark black area. The image to the right was created by flicking the chemicals from the bath onto the paper.

Tuesday 22 February 2011

Photography

I focused on Photography quite a bit in my last project as the final poster was image-led. Since the hand-in I remembered looking at the work of John Rankin and wished I'd mentioned him in my sketchbook.

http://rankin.co.uk/

His work is amazing and what I particularly find interesting is how he manages to capture the character of his subject.
Thom Yorke, Radiohead

Pete Doherty, The Libertines

His lighting allows him to create beautiful images and makes me want to learn more about his mothods and the photography process.

On Thursday I will be having my first photography induction at the University. I can't wait as its something I've been wanting to get into for a while now and that has been shown in my past projects.

Monday 21 February 2011

Final Poster - Presentation

On friday I presented my final poster design to the class. I tried to show the development from the original idea to the final A2 piece. I made a point of addressing the various aims put forward in the brief. I showed a clear thought for the posters target audience and explained my 'journey' concept and how it could relate to them.
I am fairly satisfied with my final design, I think the type could still do with a bit of work but that will have to be done in my own time now as we've just been given a new brief. 

I think the presentation could have gone better, in the last few I've been trying a method in which I haven't been using key cards or notes and just talked about what was on each slide. The method works for me but I need to prepare what I'm going to say as I feel I may have missed out some key points on friday.

Wednesday 16 February 2011

Road Typography

I managed to speak to my tutor today about my final design idea and we decided it still needs a bit more work.  The edge of the text box created a line/divide which was not aesthetically pleasing. I also hadn't really created any hierarchy within the type. It was not clear what was to be read next and what was the most important information.
So I went back to the working on the type. I'd explored all the 'safe' options but couldn't find a solution to the design problem. I went back and did a bit more research into image led posters and decided that I needed to create a focal point. 

When someone looks at a portrait, the first thing they see is the eyes. I decided to create a frame around the eyes using the type. So the observer looks at the eyes then moves onto the title.
I liked the idea of the audiences eyes moving down the page, on a journey. I thought creating a road out of type would be fitting to the subject at hand.

Tuesday 15 February 2011

Road to Nowhere - Final Design

I'm closing in on a final poster structure. I'm following a simple 4 x 7 grid with 28 fields. The grid allows me to keep the main focus on the image.
The title and sub-titles fit to the first two fields in the top left. They are in equilibrium with the contact information in the bottom right.

I still need to work on the opacity of the text boxes, the darker they are the more the type stands out. The more opaque, the easier it is to see the image underneath. I have to try and create the right balance.
Above, the opacities range from 25% to 75%. I'm tempted to go for one between 25 and 50 because at any higher value, the balance between image and type is lost. Any lower than 25 and the type becomes illegible. 

Road to Nowhere - 'Special Edition'

I've been working on this idea of a 'special edition' poster. What makes someone want to keep a poster and have it up on their walls. Originally I thought, if the image was strong enough I could simply have a nice stock paper and aim for quality.

I then decided to think of other uses of posters. During the world cup I had a poster that had a timetable on the back. This was obviously useful but frustrating when I had to take it off the wall and turn it round to look at the back.
I believe I have solved this problem in the above image. If the poster was split in half and folded out to reveal the complete image I could place information on the insides of the 'wings'.

So at any one point there would always be a complete poster image. If both 'wings' were opened it would have a complete image with information on either side.
I would have to think about printing on both sides of an A2 sheet as well as the type of paper; string but still foldable.

I think this should tick all of the boxes in the brief; both the image and message and now the special edition have been addressed. 

Sunday 13 February 2011

Road to Nowhere - Text Box

Over the weekend I've been working on putting the type on my poster without obstructing the image. While researching into how type is used on black and white images I came across this idea of using a coloured text box. By adding an 'opacity' we are still able to see the image through the text.
I started off with the red of the filmfour logo but then decided to go black to blend in more with the image. I think I'm on to something but it still needs a bit of work.
I can play around with the opacity, if its made darker the type stands out more but it becomes harder to see the image,

Thursday 10 February 2011

Road to Nowhere - The Grid

Yesterday I went home to take some photos of my Granddad. He wasn't too pleased when I said I needed an old weathered face! I tried to replicate the stock image I used last week to explain my idea in the critique.
Again I've had to focus on the grid when positioning the type. The face forms a natural grid with the nose in the centre.
I have to work in the text so it becomes part of the image. It shouldn't obstruct the image but must also be clear and legible. The one on the left feels more 'edgy' and 'current', but we've been warned about having type on its side as we naturally read from left to right.
I've started to come up with my own grid, its a mixture of the two above. Using the natural grid of the face, and the lines in the face as contours/guidelines for the type.

Its a very hard task, working the type into the image. I think the concept is perfect so I need to work on placement of the type, because I want to get it right. I'm going to look into other black and white posters and see how they deal with type.

Tuesday 8 February 2011

Historical Studies - Pepsi

We've been asked to compare two pieces of graphic design from different periods and discuss the reasons behind the changes in style.

When I was reaching logo design for the 'Digital Graphics' project I discovered how much the Pepsi logo has changed since it was originally designed in 1898. The origional design resembles the distinctive cursive script used by Coca-Cola in 1885. The typeface, known as Spencerian Script, was the main form of formal handwriting in the United States.


The most recent Pepsi logo was designed by Arnell, an american brand and product invention firm. It has a much more modern, minimalist and iconic image.

The brand identity, and most importantly the logo, has undergone a radical change to create a new modern image, which still pays homage to its original designs.

Monday 7 February 2011

The Grid

Today we had a tutorial lesson on 'The Grid', an essential tool used by designers in order to create coherent work which is aesthetically pleasing but also controls the viewer and tells them where to look next.

The Brief

We were given 4 grids and were required to use them to make a range of poster layouts:
  • 1 field - Idea, Image, Strap-line, 2 Logo's
  • 4 fields - Idea, Type, Strap-line, 2 Logo's
  • 12 fields - Idea, Image/Type, Strap-line, 2 Logo's
  • 20 fields - You decide combination but must include 2 Logo's 

I was quite happy with the work I created today, the task taught me a lot and I think it could prove to be very useful when creating my final poster for the Graphic Projects module.

Thursday 3 February 2011

Film Festival - Poster Concepts

Tomorrow we need to have 3 rough versions of the film festival poster. Each poster needs to have a different concept. At the moment I am going with:
  1. Audience on a journey
  2. Character has been on a journey
  3. Symbolism of a journey
I think each the of 'concepts' are broad enough to contain several ideas and experimentation. Below are the rough drafts of the posters:


I think the central image is the most striking and would attract the audiences attention. At this small size I think the third one has the most obvious message.

Things could all change tomorrow once I have had my critique but I'm open to suggestions because I think I'm starting to hit a wall. I need to get my sketchbook up to date and do a bit more research. I want to play around more with the second concept (weathered face). The idea of the lines on the face also representing paths could be something I could look into.

Weathered face

Today we had a studio session with our tutor in which we could talk through our ideas. One of the main aims of this project is to teach us the definition of a concept, a group of ideas based around a similar theme.

I realised that the idea of a chair on a road is a nice idea, but not necessarily a concept! An audience member going on a journey however could be one. I'd need to work on finding different ways of portraying that idea.

Concept 2 - Weathered Face

I put that idea to side for a bit and went back to one of my previous 'concepts', which was the idea of a weathered face symbolising a person who had been on a journey.


I think this would be a much better visual, it could be striking and provoke emotion with the audience. With this concept there are several areas I could investigate:
  • lines on face representing roads/map
  • face/contours could represent a landscape from above
  • 'the star' of the film who has been on a journey - aged/tired
I think the idea of keeping it simple in black and white photography is in keeping with the film style of the project. It will create emotion rather like a film does.

Wednesday 2 February 2011

The Journey

One of the concepts I'm working on at the moment for the poster is the idea of a film taking the audience on a journey. People go to the cinema to be entertained but also for the escapism and i think that idea is captured well in this image.


I think the idea fits in well with the given target audience (18-28), its an impact image with a modern idea behind it. The idea still needs a lot of work and some photography of my own could really help. There is also a given text we are required to incorporate into our poster, so I need to work out where that will go.

Tuesday 1 February 2011

Graphic Design - iPhone Apps

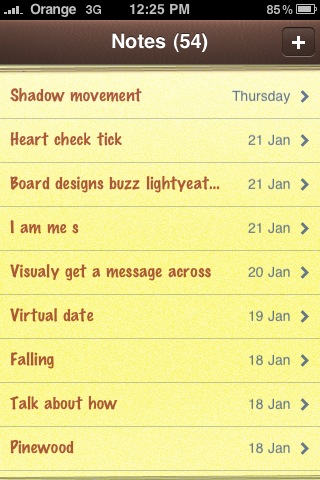
I've been using 'Notes' on my iPhone a lot recentley to jot down any ideas or thoughts I have about my projects. The process has been very useful as I don't have the best memory and don't always have my sketchbook with me.
It got me thinking about other apps that could be beneficial to my course and future career in Graphic Design. Below are my top 5 apps for designers:

1. Omnifocus

Omnifocus allows you to organise your work and is particularly useful if you have several projects on the go. It reminds you when a deadline is approaching and lets you tick off the work as your finish it.

2. Sketches

Sketches can be used along side 'Notes' if I have an idea but not sure how to express it in words, I can simply just sketch it out with my finger.

3. What the Font

What the font is a brilliant app I found recently that allows you to scan a piece of design such as a poster or web banner and then detects what font has been used.

4. Dexigner

Dexigner delivers the latest design news, events, exhibitions, conferences and design competitions. It lets you keep track of what is happening in the world of design today.

5. Adobe - Tutorials

Adobe have created several apps that consist of tutorial videos on their creative suite. I downloaded the Flash app a few weeks ago when I was creating my web banner. The menu is very useful as it allows you to select specific areas of Flash that may be troubling you and lets you watch those videos.